Introduction
The Preview Editor is a recent feature introduced in ACC 3.0.
It allows developers to test their Specie setup without having to launch the game in runtime.
This is useful for:
- Validating that parameter data is correctly configured
- Testing whether your code (e.g. ParamHandlers) is agnostic and robust
This feature is experimental.
In this editor, a simulated World is used by spawning real Actor instances —
unlike the typical FPreviewScene approach used elsewhere in UE.
As a result, performance in the editor may be slightly more demanding,
since we're simulating a full scene with lights, post-process, and active materials.
Prerequisites
Before anything else, make sure the Gender you're previewing has a valid PreviewActorClass assigned —
otherwise the preview will not work at all.

The PreviewActor should closely resemble the actor you use in-game.
It doesn't need gameplay logic — it must be fully agnostic to the GameInstance or runtime dependencies.
It should only include what's needed for visual appearance.
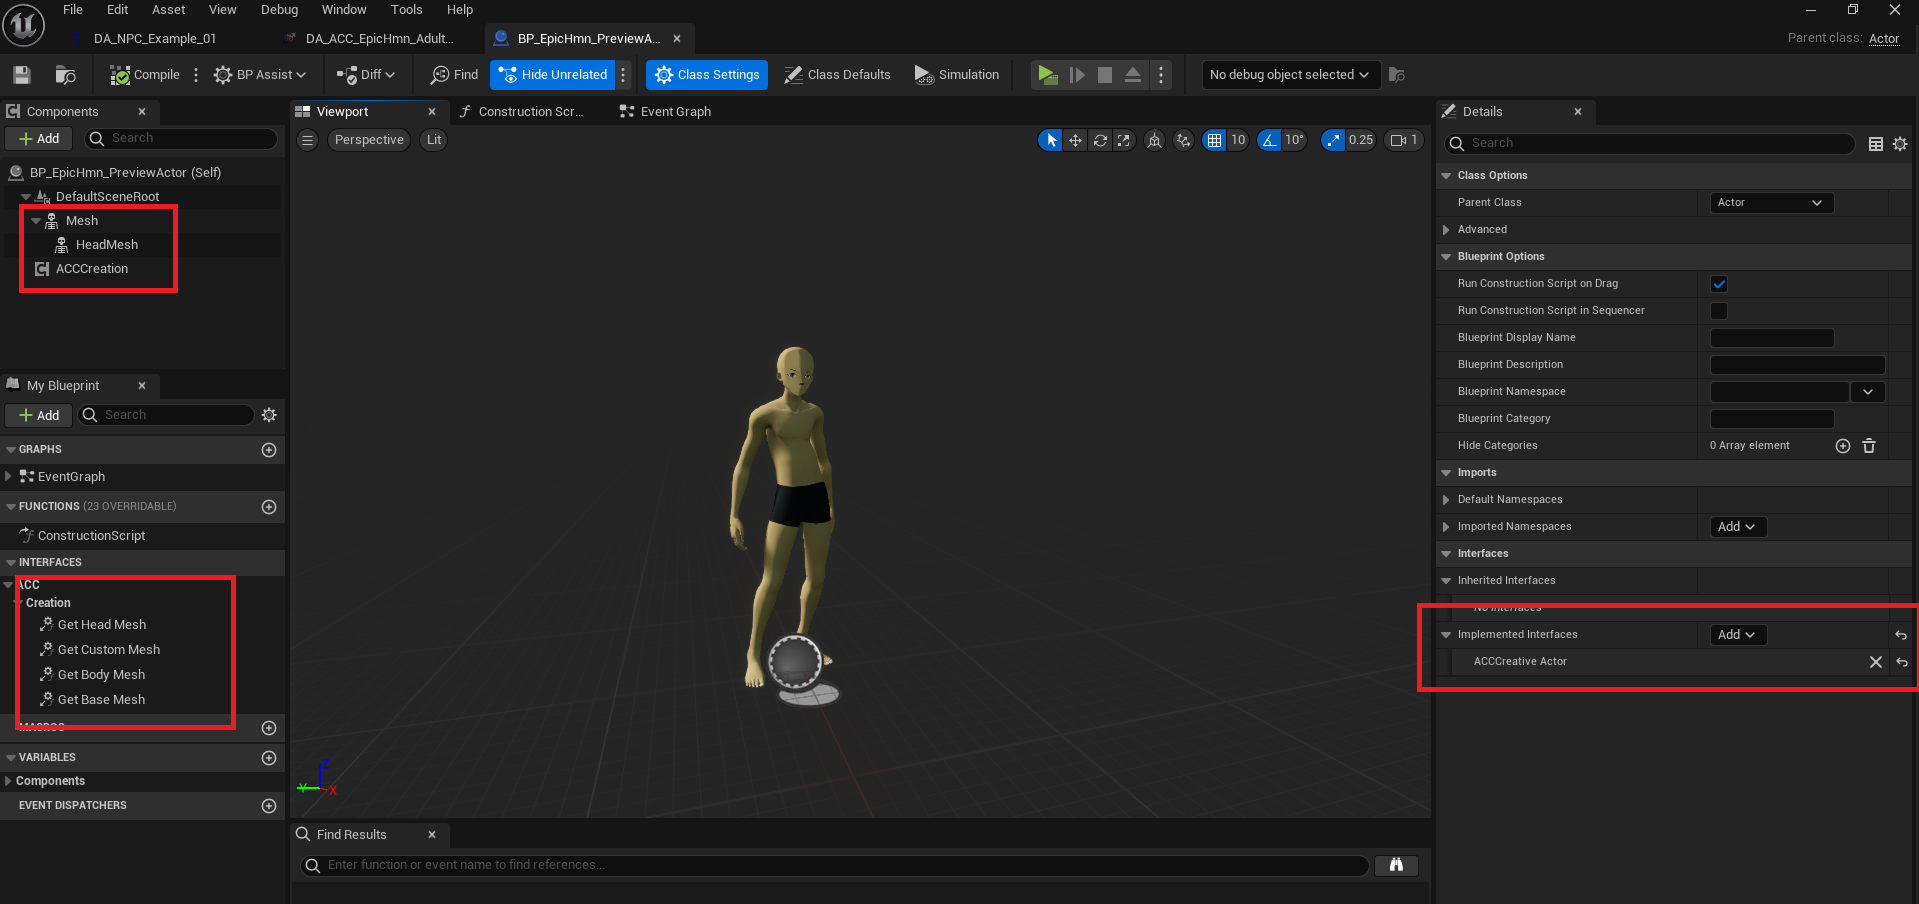
Minimum requirements for the preview actor:
- A body mesh with the head attached
- An
ACCCreationComponent - Implementation of the
ACCCreativeActorinterface to resolve appearance elements (Base, Body, Head)
How to Open the Editor
To open the editor, simply open an ACCCreationDataAsset.
For the purpose of this documentation, we'll open an existing asset rather than creating a new one.
Both methods will be shown, but keep in mind that we'll proceed with an existing one in the examples.
You can either create a new one or open an existing asset.
The data asset can be created from the context menu
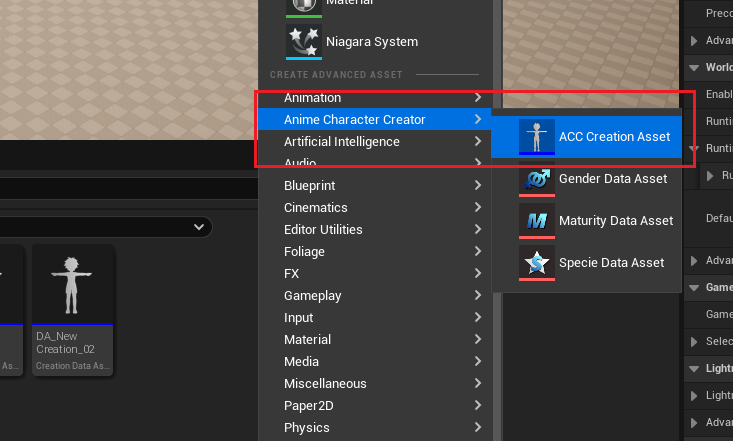
Once named, a popup will appear allowing you to choose default data based on your Specie configuration

Or open existing (method used for this doc)
For this example, we'll use the DA_NPC_Example_01 asset from the template:
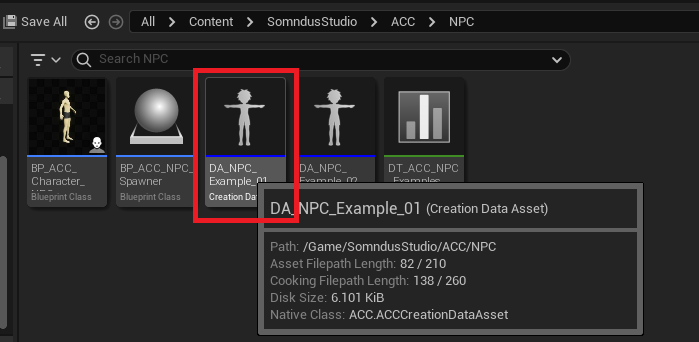
Once opened, the editor will launch with multiple tools and sections.
The Toolbar
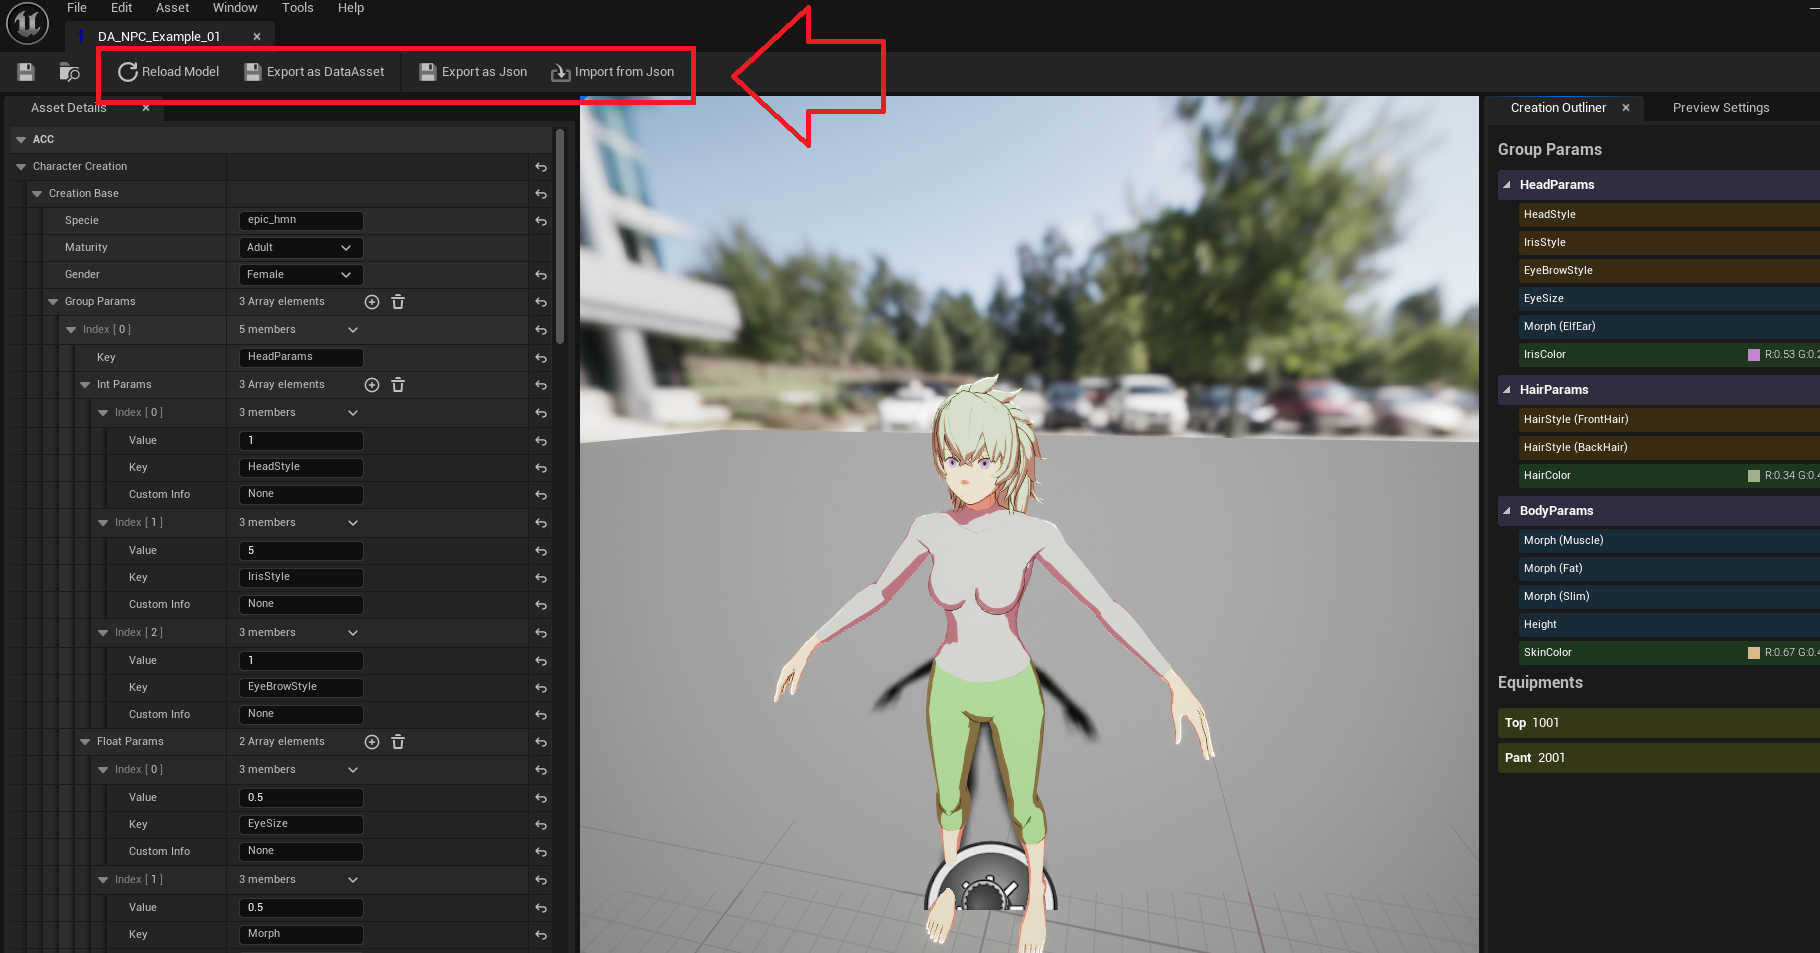
Here's a breakdown of the toolbar options:
-
Reload Model: Forces the preview actor to reload.
Useful if a parameter wasn't applied correctly or if the preview actor blueprint was modified and broke the preview. -
Export As DataAsset: Duplicates the current setup into a new
CreationDataAsset. -
Export As JSON: Exports the character creation data to a
.jsonfile. -
Import As JSON: Imports character creation data from a
.jsonfile.
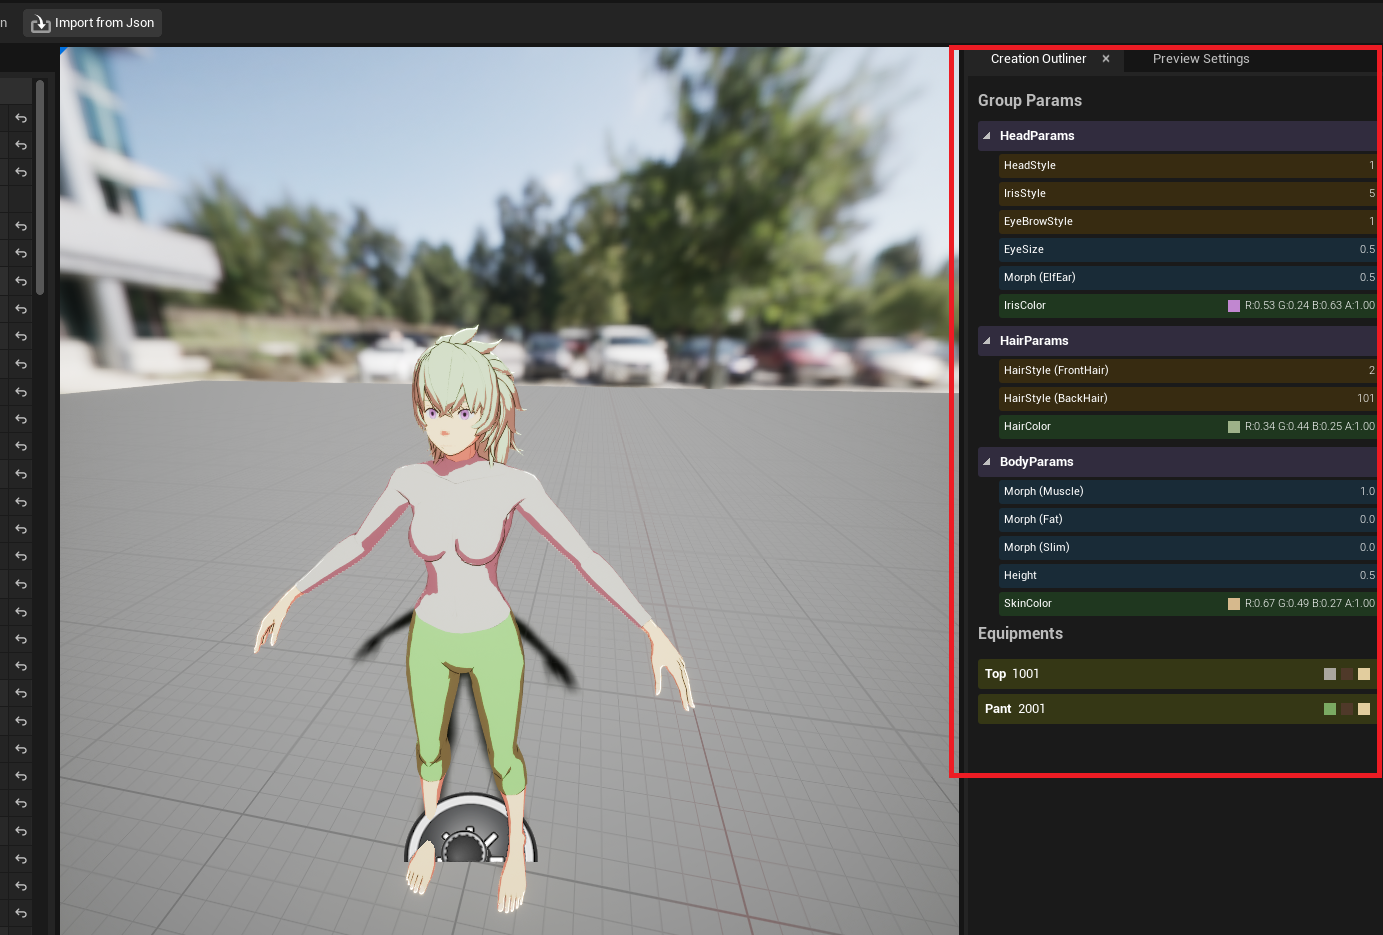
Outliner
A custom Outliner is displayed on the right side of the editor.
It provides a cleaner and more focused view of your current creation data,
so you don't have to expand raw nested structures on the left panel.
This makes it easier to understand and debug what's being applied during testing.
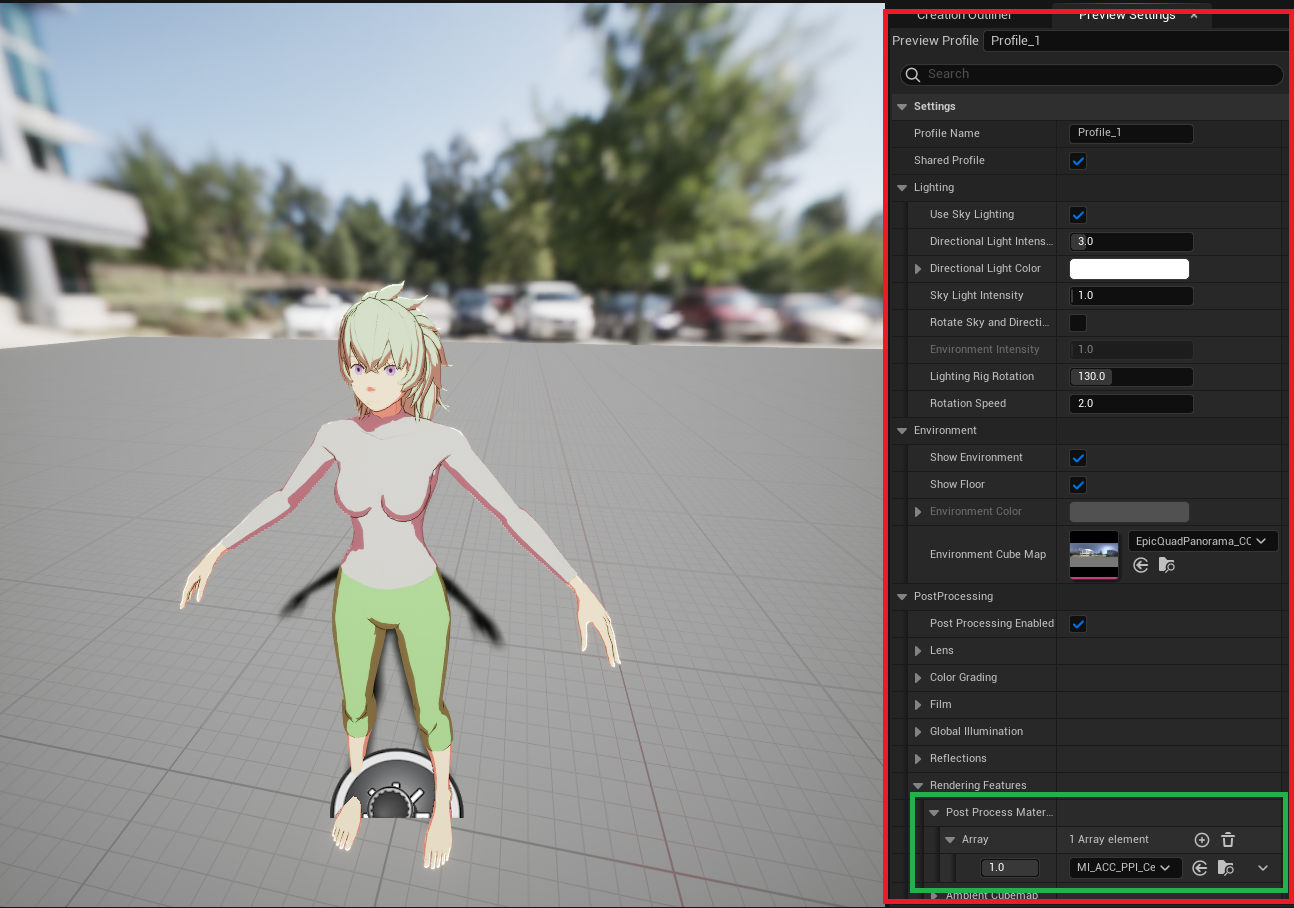
Preview Settings
Just like the Advanced Preview Settings panel available in various UE5 assets,
a custom version has been implemented here for convenience.
It allows you to tweak post-process effects, lighting, and other environment settings
to improve preview quality and make the workspace more comfortable.
You'll notice that the system integrates UE5's built-in environment profiles,
to avoid reinventing the wheel and offer native-quality presets: